Consultants for Your Building or Renovation Project

Building Consultants – An Intro

Building or Renovation Project Consultants

Building consultants are the people who, in conjunction with the client, develop the vision, carry out any required research, and develop detailed plans for a building or renovation project.

In a nutshell, building consultants are the “professionals” who may be required to be engaged during the construction process.

Below is a list of the common building consultants you may be required to engage for a building or renovation project.

It is unlikely you will be required to engage every building consultant on this list at any one time. However, it is good practice to be aware of a good range of consultants and the services they provide and where this may be helpful, or essential for you to use.
Consultants for Your Building or Renovation Project

Your First Building Consultants - The District Planners

Speaking to your local Town or City Planner is an important first step to take prior to any building, renovation or construction works.

Planners are the people who know the ins and outs of your Territorial Authority’s District Plan. Your local Planner will let you know whether your construction project is a “permitted” activity under the Resource Management Act 1993.


Your local district council’s planner will also let you know if the infrastructure in your area has unused capacity. If not, you will be informed about the Resource Consent process and the steps which need to be taken to move forward.

You can make an appointment with your Town or City Planner by getting in contact with your local Territorial Authority (District Council). Depending on the policy of your Territorial Authority, an appointment with a planner may attract a charge.

About Cadastral Surveyors

A registered Cadastral Surveyor is the only person who is legally entitled to lodge cadastral information to Land Information New Zealand (‘LINZ’). In simple terms, cadastral information are the data associated with the establishment and re-establishment of real property boundaries.

In some cases, a Cadastral Surveyor may work in conjunction with a Lawyer or Conveyancer to register easements or covenants over land.

In the construction process, a Cadastral Surveyor may be required in the following circumstances:

  • To map and establish property boundaries in the case of a greenfield development/subdivision
  • To establish a datum point (a point of reference) for consultants and trades to work from
  • To perform boundary adjustments
  • To provide cadastral information for the establishment of easements or covenants

When Might I Need a Property Lawyer/Conveyancer

Your Property Lawyer or Conveyancer (‘Conveyancing Professional’) can serve many different purposes throughout the construction lifecycle.

The most likely encounter you will have with either of these building consultants will be when you sell or purchase a property. However, if you find yourself in need of the registration of an easement or a covenant, or the removal of an encumbrance over your title, you may find yourself in need the advice of a Conveyancing Professional.

It is also advisable to obtain due diligence (dotting your ‘I’s and crossing your ‘T’S) from your Conveyancing Professional when:

  • Contemplating the purchase of any parcel of land
  • After talking to a planner regarding a boundary adjustment or subdivision
  • Intending to build/renovate a property on a cross-lease title


Using a Licenced Registered Architect

In many ways, your Architect is the most important building consultant you will deal with during your building or renovating project.

It is the job of your architect to take the vision of what you want from your project and make it a reality.

If they succeed, you will be forever grateful, if they don’t, you could end up with a set of plans which are as useful and costly as the Emperor’s New Clothes.

Architects have a reputation as the ‘divas’ of the construction world and are perceived as relatively inflexible in their views, but this is not usually the case. However, it is important to select an

Architect for your building or renovating project who has a good reputation for designing properties of the style and price point that you are looking for.

If requested, your Architect may act as the ‘Lead Consultant’ and ensure that all consultants and trades are coordinated and the appropriate consents and paperwork have been lodged.

The types of project you would engage an Architect for are:

  • Complex residential builds
  • Unusual designs
  • Projects where quality/type of materials is a factor
  • Projects which need to be overseen

What About a Heritage/Conservation Architect?

A Heritage/Conservation Architect (‘Heritage Architect’) is only required if you are undertaking a renovation or build project that effects an existing Heritage Listed building.

Your building consent may be delayed if you knowingly try to avoid engaging a Heritage Architect.

Depending on the scope of works and the Heritage nature of your building, the Heritage Architect will be involved at different points throughout the construction process.

The Heritage Architect will usually check over the plans of your own Architect to ensure the heritage nature of your building is not adversely affected.

These checks are not always fatal to plans for renovations/additions/extensions, but may limit the extent of any modifications. The Heritage Architect may also request to observe any potential deconstruction/reconstruction of any heritage listed parts of your building.

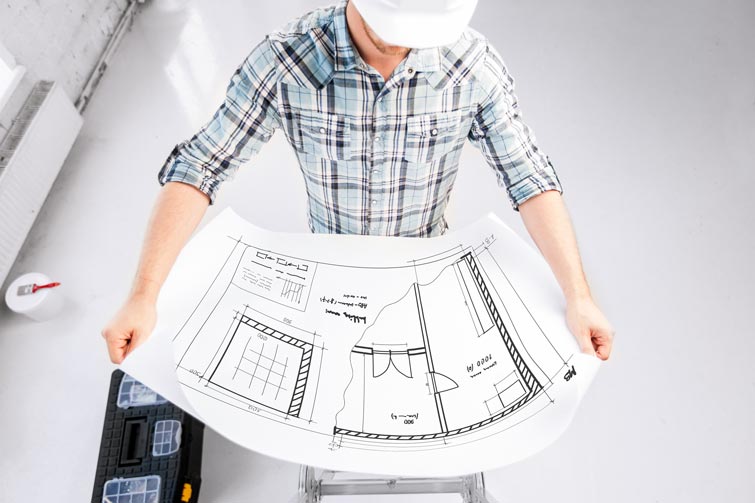
Draftsperson v Architect for Your Renovation Project

A Draftsperson is an individual who drafts technical drawings of houses. A Draftsperson differs from an Architect in that the Draftsperson will likely only agree to work on straightforward building or renovation projects where a client has a very clear idea of what they want. It is not the domain of the Draftsperson to design complex and aesthetically pleasing.

Like an Architect, a Draftsperson has a very good grasp of the building code and the rules and regulations surrounding the building process. However, your Draftsperson will not “hold your hand” throughout the building process and will not ensure that their designs and specifications have been followed on site.

The use of a Draftsperson would be appropriate on projects which:

  • Are not overly technicalAre not large, i.e. construction of a new house
  • Aesthetic quality and the use of specialist products are not a consideration
  • You know exactly what you want

Should You Use a 3D Modeller

The 3D Modeller is an excellent consultant for those of you who cannot visualise the look and feel of a project from a set of plans. Upon commissioning, you would usually submit your architectural plans, any photographs of the project site, and a short list of colours and finishes to your Modeller.

They will then convert the 2D sets of plans into a series of 3D images and may even have the ability to produce a video walkthrough.

The services of a 3D Modeller are useful for:

  • Generating pre-sale interest for a project
  • Giving a 3D visual representation for personal use and to show friends
  • Allowing you to test colours and finishing’s with minimal cost

Consultant Archaeologists

An Archaeologist is a type of scientist who excavates and investigates the origins of anthropological and human remains. An archaeologist will be rarely required for a construction project but will be required if requested by Heritage New Zealand or a Heritage Architect.

An Archaeologist may also be required in a range of different circumstances:

  • You are building on or near a site which has been designated as Waahi Tapu
  • You are renovating or building on a heritage site
  • Human remains have been found during the construction process
  • Historic remnants have been found during the construction process

The Essential Geotechnical Engineer

A Geotechnical Engineer (also known as a Geotech) is required for all construction projects whether large or small.

It is the job of the Geotechnical Engineer to assess soil and ground makeup, the risk of liquefaction of the ground, A Geotechnical Engineer will produce a report where recommendations as to the level of excavation, the ultimate bearing of the ground, and the method required for any fill will be made.

This report is required to be submitted to your Territorial Authority at the time of the building consent. A Territorial Authority may also require that the Geotechnical report is peer reviewed by a third party Geotechnical Engineer.

The detail of a Geotechnical report is dependent on the ground conditions of your site and by the proposed design of your building or renovation project.

The Geotechnical Engineer will need to work closely with other consultants such as your Architect and, if applicable, your Structural Engineer.

Fire Engineer

A Fire Engineer is responsible for any aspects of fire safety which are mandated for the building code. These vary depending on whether a building is residential, commercial, or industrial, and can be dependent on the number of intended occupants.

The Fire Engineer will specify different products, building techniques, and coatings for different parts of a building or renovation project to achieve a minimum burn time.

For a commercial project, a Fire Engineer will also specify the type of fire alarm, smoke detection system, and will calculate fire egress times.

A Fire Engineer will usually carry out several inspections throughout the construction process to ensure their designs are being constructed according to specification.

For a residential project, there are a few different scenarios when you will have the need to engage a Fire Engineer, some of these are:

  • When your project is directly adjoining another building
  • When your project is within the minimum setback from a boundary as specified by the Building Code
  • When your project is multi-storey and only has a single staircase

The Structural Engineer

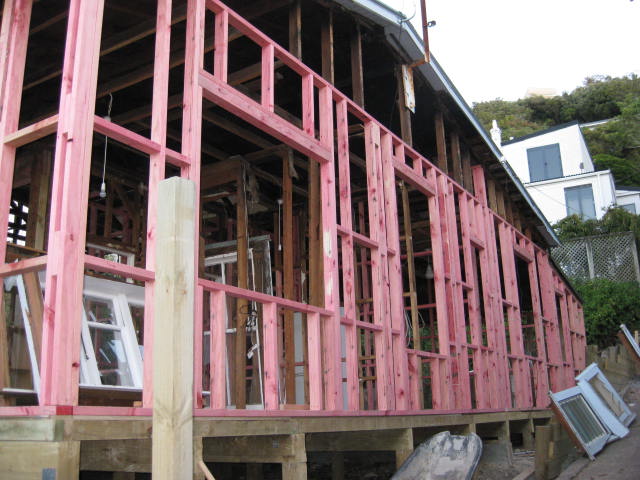
Standard NZS3604 – the New Zealand Standard for Timber-Framed Buildings allows an Architect or a Draftsperson to design a Timber-Framed Building up to Two Storeys on good ground.

However, if your Architect is to venture outside the scope of the standard, or if your Geotechnical Engineer reports that your project is on poor ground, you will likely need to engage a Structural Engineer.

According to the Building Code, a Structural Engineer is required to design anything which is outside the scope of NZS3604. A Structural Engineer will carry out several inspections throughout the construction process to ensure their designs are being constructed according to specification.

You will need to engage a structural engineer if your project involves the construction of:

  • Retaining walls over 1.5 metres high
  • Over height floor to ceiling windows
  • Cantilevered floors
  • Poor ground conditions
  • The use of steel portals in your timber frames
  • Second storey or cantilevered decks
  • The design of balustrades

Do I Need a Volcanologist?

You are unlikely to need to engage a Volcanologist directly. However, in rare cases a Geotechnical Engineer may request input from a Volcanologist.

This may become a concern if your proposed building or renovation project sits above a geothermal field (as in certain parts of Rotorua or Taupo), on or near a volcano, or where there are hot springs close by.

The Volcanologist may be required to submit a report on the likely structure of the underlying geological processes of the land, any gases that may be emitted, and whether the land is suitable to build on.

Working with a Quantity Surveyor

An experienced Quantity Surveyor can be an invaluable resource throughout your project. The job of the Quantity Surveyor is to take the detailed designs provided by your consultants and quantify the material cost, the labour cost, and all other ancillary costs such as disposal, demolition, and wastage.

A Quantity Surveyor will provide you with a report which will have an estimate of the cost of your project based on current market rates and estimated times for completion. There should also be a value provided for contingency (price fluctuations, ground conditions, etc) to cover any unexpected costs.

It is advisable to use a Quantity Surveyor prior to construction of your project but after your consultants have provided you with developed designs. A Quantity Surveyor can provide a cost estimate based on a concept design, however, it will have a large contingency and a stated margin of error.

Next Week

Next week, I will be giving a rundown on how to select the right consultants for your needs. This is an especially important task, as the use of the right consultants can either make or break a project…

Building and Renovating Project Mangagement

DIY Project Management of a Renovation or Build – A Series

What You Need to Know About Home Build Project Management

Over the next few months, I will be writing a series of articles for those of you who fancy having a crack at managing your own home renovation or build.

The aim of the articles will be to gear you up with the basics of managing a project in New Zealand, what you should be looking out for, and the questions you should be asking.

By no means would I ever profess that these articles are a comprehensive checklist, rather, a roadmap which should get you heading in the right direction when contemplating major renovations or new home builds.


Building and Renovating Project Mangagement

What House Building Scenario Will Be Covered

Throughout the series, I will be working my way through the hypothetical construction of an architecturally designed two storey dwelling on a sloping site.

From a Project Management point of view, this will be somewhat of a technical house build and will have a few extra steps than a “cookie cutter” single storey build on a level site.

Deciphering the Complexities of the Building Project Management Process

The project management process is not for the faint of heart, nor is it as simple as your average housing company makes it out to be. From the word “go” there are decisions to be made and questions to be answered which will affect the overall quality and success of your home building project.

Who are your consultants? Are they reputable? Are your Engineer and Geotech CPEng? Does your architect hold an LBP for design? What is a CPEng? What is an LBP? Does your Territorial Authority require a Peer Review for your Geotech Report?

These decisions and questions can sometimes stump even the most well-seasoned Project Manager, leading to budget blowouts, variations, and extensions of time.

What Makes a Good Project Manager for a Build or Renovation?

In the construction industry, there is the common misconception that a Project Manager is nothing but a “human mailbox” or a meddling middle man who “clips the ticket”.

This misconception may lead to an overzealous but underqualified builder who has been on the house building and renovating scene for all of five minutes to include Project Management services as a package deal with their carpentry services for a bargain bin rate. Why? Because how hard could it be?

This may also get cogs turning in the mind of the prospective home builder who wants to save a dollar. Maybe I might manage my own project! Why? Because how hard could it be?

Successful House Building and Renovating

Success of a project depends entirely on a combination of the preparation, negotiation skills, construction experience, contractual knowledge, and industry connections of the individual managing it.

If mismanaged or managed poorly, the financial fallout will likely resonate for years to come. Be it by way of early life failure due to a contractor not following a consultant’s specification, by the necessity to drag consultants and contractors through Court in the attempt to recover costs, or by a contractor that has mysteriously vanished into thin air midway through a build just to name a few.

A word to the wise – research, research, research.

Am I Crazy to Attempt DIY Project Management of my Build?

It’s not all doom and gloom however, as successful completion of a self-managed construction project can be one of the most rewarding things you will ever experience.

That feeling when you get that first Code Compliance Certificate under your belt is second to none. Not to mention the savings that can be made.

In the Coming Weeks – The In’s and Outs of the Build and Renovation Process

To help out you potential renovators and builders and budding project managers – over the coming weeks I will give a rundown on the following house building and renovating topics:

  • The different consultants in the construction process, what they do, and why they are necessary
  • How to select the right consultant for the job
  • How to navigate the legal landscape of consultancy agreements
  • Construction insurance – What is it and what cover should you have?
  • The different trades, what they do, and why they are necessary
  • How to select the right trades-person for the job
  • Requests for tender, what they are, and how to prepare a basic request for tender
  • Construction contracts and the Construction Contracts Act 2002
  • Dealing with extensions of time
  • Dealing with variations to agreements and contracts
  • Practical completion and the defects liability period – What are they?
  • Completion and Code Compliance

Hopefully – by the end of this series you will have the complete picture of what is involved in building a home or renovating a home in New Zealand – and you can make some informed decisions!

Replacing Scrim With GIB – What Does It Cost To Re-GIB?

In previous post we discussed what Scrim and Sarking is and why it should be replaced. Then we talked about just what re-GIBing is. Now we are getting down to it – the money...

What is it Going to Cost to Re-GIB – The Basics

For a straightforward room (a small double room with not too many fiddly bits!) the cost of re-lining with plasterboard (re-GIBing) depends mostly on the wall area that is being covered. It can cost upwards from $800 - $1,000 per room to get the room to a state that it is ready for painting i.e. Plasterboard put up and plastering of the joins to give a smooth finish (GIB Stopping). This price would be for a DIY job with a GIB-stopper hired in. A big factor is whether you do it yourself or hire in the professionals – this will add a lot more to the cost - and if this is the way you are going - get a few quotes.


The type of plasterboard or GIB you use can impact on the cost – GIB Standard® is the most inexpensive – if you use GIB Aqualine® in wet areas such as kitchens, bathrooms and laundry’s or GIB Noiseline® where you want noise reduction then the will cost a bit more. To find out more about the GIB products check out their website.

What is it Going to Cost to Re-GIB – Wait! There’s More!

How you prepare the room for re-GIBing can impact hugely on the cost – are you going to strip all the Scrim and Sarking off? Or just strip off the Scrim and screw Plasterboard to the old Sarking board?

Replacing Sarking with GIB - Cost to Re-GIB - Removing Sarking Boards

Removing The Sarking Boards - Some Dry Rot Exposed

Commonly the Sarking board provides a horizontal bracing element for the house – i.e. there are no Dwangs behind Scrim & Sarking walls – you will need to replace this bracing element if you remove the Scrim & Sarking completely. This is now a structural issue – don’t ignore it! It important to address properly and may involve putting in new Dwangs and/or even using a product such as GIB Braceline®.

Replacing Sarking with GIB - Cost to Re-GIB - Wall Structure After Scrim and Sarking Removed

Wall Structure Once Scrim & Sarking Removed - No Dwangs

If you do remove the Scrim and Sarking completely you never know what you are going to find. Often you find relic’s from a bygone era in the form of old coins, bottles and cutlery, but less fun is finding rot – which will need to be repaired, and the source of the rot identified and fixed, before you can re-GIB. The costs of this kind of find can add up...

Replacing Sarking with GIB - Cost to Re-GIB - Dry Rot in Wall Framing

Dry Rot & Borer Exposed

If you are planning on insulating (which is always a great idea!) this adds to the cost, and again, if you choose higher rated insulation or insulation with noise reduction properties the cost will increase.

How do you insulate if you are not removing the Sarking Board? You can take out every third board and feed the insulation in. This keeps the bracing element of the Sarking Board but allows you to insulate the wall cavity. Just remember where the missing boards are when you are screwing the GIB on!


Something that can really impact the cost of re-lining is what you decide to do with the existing covings, architraves and skirting board – can they be kept in place? Removed and reused? Or do they need to be replaced? The majority of re-GIBing situations require coving, skirting board and architraves to be removed.

Sometimes a ‘work-around’ can be arranged if you have intricate moulded covings you want keep. Re-GIBing can be done where the GIB butts up next to architraves and sits on top of skirting boards – but in most cases it is hard to get a good finish with this technique.

So replacing your Scrim and Sarking wall linings is going to take a bit of planning, and probably a bit more money than you thought - so make sure you have the time and the budget to do it properly before you start.

The Propertytoolbox Home Buyers Guide

Want more home buying info and advice? Head to our home buyers guide. With advice on all aspects of the home buying process - all you need is here.


Replacing Scrim With GIB – What Is Re-GIBing?

Last week we discussed just what Scrim & Sarking is and how to identify it. Then we talked about why GIB should be replaced. Now, before we move on to the cost of re-GIBing, we are discussing just what re-GIBing is...

What Is Relining? Or Re-GIBing?

Relining or Re-GIB is when Scrim (or any other inferior wall lining) is replaced with plasterboard. In NZ Plasterboard is commonly referred to as GIB – this is the brand name for the most commonly sold form of plasterboard. GIB has been around for a long time and is considered an iconic NZ brand.

What is GIB or Plasterboard?

Plasterboard is a rigid board which is made by casting gypsum plaster and coating with paper. All plasterboard resists fire and is the most commonly used wall board product in new builds. Current building regulations require certain specifications for wall board and fire ratings for all walls. Modern plasterboard is designed to meet these requirements.

re-GIBing - replacing scrim with GIB

Scrim and Sarking Removed - New GIB On

Once new plasterboard has been put up the final part of the re-GIBing process is GIB-stopping. GIB stopping is where the joins between the GIB sheets are plastered to give a seamless finish. While working out how to put up GIB just takes a bit of research, the right tools, planning and some muscle – GIB-stopping is a bit of an art! It pays to hire in some highly recommended GIB stopping talent for this bit.

GIB is made by Winstone Wallboards. On their website they have all the resources you need to find out about GIB and how to install it.

Re-GIBing – It’s Just a Small Part of Renovation

Re-Gibing it not just about putting up some plasterboard – it is an opportunity to sort out a lot of things in a room, when you strip off the old Scrim &/or Sarking Board you are going to get a window of opportunity to access difficult areas and usually inaccessible components of your house.

This is a great opportunity to insulate! Insulating exterior walls is a must, but even insulating interior walls with normal or sound proof insulation can improve your enjoyment of your home, keeping it warmer and quieter!

re-GIBing - replacing scrim with GIB

New Insulation & New Wiring Including CAT5

You can take the opportunity to replace old wiring in a room you are re-GIBing and even put in more plugs, light fittings and switches. What about wiring for speakers etc? And have you considered smart wiring (CAT 5)?

Next Post - Re-GIBing Scrim - What is it going to cost to re-GIB

The Propertytoolbox Home Buyers Guide

Want to find out more about how to identify problems with a house before you buy it? Check out our guide to building inspectors – or for a quick do it yourself read our house inspection tips.


Replacing Scrim With GIB – Why Should I Do It?

Last blog post we discussed just what Scrim and Sarking was and how to identify it. This week we are discussing why it should be replaced. If you want to skip right to the practicalities check out our posts on - what is re-GIBing and what will it cost to re-GIB.


What’s Wrong With Scrim and Sarking?

Scrim and Sarking is a fire hazard – is it dry and brittle – having been aging and drying within your house for nearly 100 years. Combined with aged wiring, the risk of fire, and risk or significant damage from a fire, is much higher than that of a modern home.

Scrim wall linings are also very unsuitable for the purposes of redecoration. When scrim deteriorates, it comes away from the Sarking leaving an unstable base for painting or wallpapering (particularly in room corners – this is a very tell-tale sign of Scrim).

Why Should I Re-GIB?

Insuring your home can be problematic when you have inferior wall linings. Your insurance company will ask if your house has been relined when you get insurance, they consider Scrim & Sarking wall linings an increased risk factor for damage.

If you have Scrim & Sarking wall linings, especially combined with old wiring your insurance company may not be prepared to offer you their most comprehensive insurance policy.

Replacing Scrim with GIB - Re GIBing - Why should you do it?

Sarking Boards Exposed

Replacing Scrim and Sarking - The Result

Replacing Scrim and Sarking with GIB will give you a stable, fireproof, smooth wall that when GIB Stopped and redecorated (painted or wallpapered) will give you the ability to get a high quality finish. Removing old wall linings before re-GIBing also gives you an opportunity to access and repair the wiring, and insulation a room.

So to ensure you home is safe, to be able to get a comprehensive insurance policy and to get the most benefit out of any renovating and redecorating – removing Scrim and Sarking and re-GIBing is essential.

Next Post - Replacing Scrim with GIB – What is Re-GIBing?

The Propertytoolbox Home Buyers Guide

Still on the house hunt? Check out our house buying guide – we have all sorts of tips and tricks to help you make great house buying decisions.


Replacing Scrim With GIB – What Is Scrim And Sarking?

Re-GIBing Scrim and Sarking is the Propertytoolbox topic for the next 4 blog articles. The articles will cover:

• What Scrim and Sarking is and how to identify it (that's all covered in this article)
why you should consider replacing it
what re-GIBing is
What re-GIBing costs

What is Scrim and Sarking

There are generally three types of wall lining used in New Zealand houses:

• Scrim and Sarking
• Low Density Fibreboard
• Plasterboard – GIB

We are focusing on Scrim & Sarking because this is the most problematic type of wall lining in NZ homes.


What is Scrim and Sarking

Scrim & Sarking – often just called ‘Scrim’ is a hessian or jute sacking material (Scrim) that has been tacked or stapled on to rough sawn, horizontally placed, thin wooden planks (Sarking).

Layers Of Wallpaper On Scrim

Scrim and Sarking forms the 'wall board' - to which wallpaper is then fixed. Over the years a Scrim and Sarking wall may have been covered by many layers of wallpaper and in more recent times painted. Scrim and Sarking was used commonly in houses built in the late 1800’s and the early 1900’s.

Sarking Boards Exposed - Wallpaper Layers & Scrim Partiall Stripped Away

How Do I Know if it is Scrim and Sarking?

If you suspect a house has some Scrim & Sarking wall linings i.e. It falls into the ‘late 1800’s to early 1900’s' age bracket. Here are three tests you can use to work it out:

  • The knock test - Scrim (unsurprisingly) feels like knocking on wood. Scrim is a very hard surface; the knock is hollow sounding, with the sound carrying well. It is impossible to distinguish any studs when knocking along the wall.
  • The floating wallpaper test – Scrim & Sarking is ‘finished’ by covering the Scrim with wallpaper (sometimes the wallpaper has since been painted). With age the hessian Scrim starts coming away from the Sarking and gives the impression of floating, bulging or twisting wallpaper. This is especially obvious in room corners.
  • Close inspection – With close inspection you can sometimes see rough sawn board (Sarking) or hessian (Scrim) where wallpaper is loose or has come away, or the wallpaper will look ‘textured’ as the woven hessian fabric has imprinted the wallpaper from underneath.

Close Examination - Sarking Boards, Scrim & Wallpaper

Using all or a combination of these techniques you should be able to identify Scrim & Sarking.

Next Post - Replacing Scrim with GIB – Re GIBing – Why Should I Do It?

The Propertytoolbox Home Buyers Guide

Do you think the house you are looking to buy has Scrim and Sarking wall linings? Not sure and want to find out more? Maybe a building inspector can help - and make sure to check out our ten key rules before you put in that offer. For more help, tips and tricks when you are on the house hunt, check out our house buying guide.